
Cinematic photography has been a massive trend of late, and for good reason:
Like a great movie, it can evoke emotions and capture the viewer.
I’m a huge fan of cinematic photography and often go for a cinematic mood in my self-portraits.
If you want to learn how to create beautiful, atmospheric cinematic photographs, keep reading, as I will share five strategies for creating cinematic images in this blog post.
By the way–I recently made a YouTube video about this topic, which you can watch here:

But back to the blog post!
To start, let’s talk about how to define cinematic photography.
(Just so you know, this post contains affiliate links. As an Amazon Associate/partner of other affiliate programs, I earn from qualifying purchases.)
1) What Is Cinematic Photography?
Cinematic photography mimics the visual aesthetics of film and cinema.
As a result, the images look like stills or frames from movie scenes.
Cinematic photography usually has a few typical characteristics:
Use of Storytelling
Although cinematic photos are not part of a motion picture, they feel part of a larger narrative:
Each image tells a story that leaves the viewer wondering what happened before and what happens next.
(Learn all about storytelling in photography in this post).
Use of Emotions
Next, cinematic photographs often convey specific emotions such as longing, sadness, despair, joy, nostalgia, or mystery.
This means that the images resonate with the viewer like a movie would.
Purposeful Lighting
Another hallmark of cinematic photography is purposeful lighting, for example:
- soft, diffused lighting that creates a calm, serene mood.
- dramatic, moody lighting that creates a lot of contrast and shadows
Composition and Framing
Next, cinematic photography is often characterised by considered composition and framing, using techniques such as the rule of thirds, leading lines, or symmetry.
Colour Grading
Finally, cinematic photography employs intentional colour grading, i.e., manipulating individual hues to evoke certain emotions.
Using some or all of these elements can help you easily achieve a cinematic look in your photography.
In the next sections, I will talk about each in detail.
2) Strategies for Creating Cinematic Images
2.1) Storytelling
The first strategy is “storytelling,” a hugely important aspect of cinematic photography.
Of course, you’re only creating still images, not a feature film, so you’re somewhat limited in regards to how complex your story can be.
(By the way, one way to resolve this is to create a whole series, which gives you more opportunity to portray all the aspects of your story).
By this point, you might be wondering what I actually mean by “storytelling”, so let me explain.
When I create cinematic photographs, I’m not simply taking a photo of something because it’s beautiful or interesting, the way a landscape photographer might photograph a waterfall or a mountain range.
Instead, I’m thinking about a narrative for my picture (remember, you’re trying to emulate a movie still here).
So, think about the story you want to tell and ask yourself:
Who is The Main Character?
Where are they, and what are they doing?
(By the way, this doesn’t have to be a person; it could also be an animal, a toy, etc.)
What Objects/Props Can You Include?
Props are a great way to help tell your story.
Think about which objects you can include in your image and who these objects belong to.
Are they showing signs of use, or are they new?
In what kind of environment are they placed?
Think about symbolism – what do those objects represent?
You can also use objects hinting at the presence of a (now absent) person.
Some examples are a just-blown-out candle, a half-eaten apple, used makeup brushes, slippers in front of an unmade bed, etc.
Which Camera Settings Will Help Tell Your Story?
If you’re photographing inside, you can pick a photogenic location like a stylish hotel room, a space with interesting wallpaper or furniture, etc.
If you’re photographing outside, use the environment to tell a specific story, for example, by shooting in an urban environment with neon lighting, in a field during the golden hour, etc.
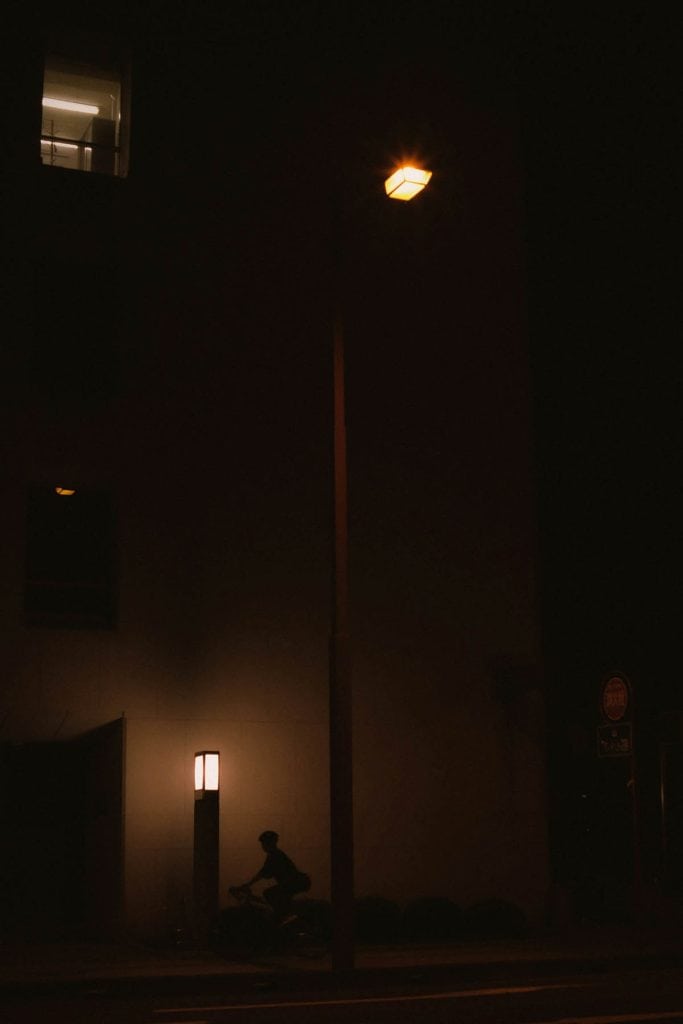
Cinematic Streetscene. Image Credit: Mak.
Before I get to the next point…if you’d like some structured prompts to create more cinematic images, check out my free 7-day email series below:
Free 7-Day Cinematic Portrait Email Challenge!
Do you want to master cinematic portrait photography in seven days? Then sign up for my free email challenge with a different prompt every day!

…but now, onto the next section: use of emotions.
2.2) Use of Emotions
Emotions can be an invaluable tool when conceptualising your cinematic photo shoot.
Think about it:
Why do we watch movies?
Yes, to be entertained, perhaps to be distracted from the everyday, but what’s beneath that?
Because we want to feel something, be it happiness, romantic feelings, joy, or even “negative” emotions such as sadness or fear.
Feeling them in a controlled environment, such as a horror movie, is strangely pleasing because you know that the feeling is only artificially evoked, and you can escape back to normality after the two-hour runtime.
This is why one of the easiest ways to achieve a cinematic look in your photography is to start with the emotion you want the viewer to feel.
For example, look at this picture:

I wanted the viewer to feel emotionally stirred in some way, perhaps feeling sadness and compassion for the teddy bear.
I used these emotions as a starting point for my decisions on lighting, props and camera settings.
Try the same for your images:
Before you start your shoot, sit down and answer the following questions:
- What emotion do I want the viewer to feel when they look at my picture?
- Is there a specific framing I could use to portray that emotion (e.g. photographing a lone figure in a field to convey loneliness)?
- If I’m using a model (or myself in a self-portrait), how can I portray that emotion through body language, make up, clothing, etc?
- Can I use technical strategies to convey that emotion, e.g., a slow shutter speed/motion blur to show despair or confusion? Or use a large aperture to blur the background and separate the subject from it, putting the focus on their facial expression?
- Are there certain universal symbols I could use to convey emotion, e.g. flowers, candles or birds?
2.3) Purposeful Lighting
Next, let’s talk about lighting; after all, mastering lighting techniques is essential for creating visually striking cinematic photographs.
Here are a few lighting tips using natural and artificial light that will help you create more interesting images:
Natural Light
Natural light is a great choice because it requires little equipment and helps you achieve a great impact.
I’m sure you’ve heard about the golden hour, the period of time just after sunrise or before sunset that is particularly soft and warm:

This type of lighting is very useful for creating nostalgic or emotional images.
If you want to achieve a moody or sentimental aesthetic, shoot early in the morning or late in the afternoon during an overcast or even rainy day (make sure to protect your camera, though!).
Even harsh daylight can be cinematic if you use it creatively, for example, by emphasising interesting patterns and shadows created by the sun.
Artificial Light
If you’re able to invest in some gear, I highly recommend you try using artificial light for your cinematic photographs.
One of my favourite options is small LED panels.
These usually allow you to change the colour, and you can set up a few in the room to illuminate the scene.
Also, they’re not very expensive and are great for travelling to different locations.
Here’s a great option:
Another option is to use strobe lights or continuous lights in combination with a softbox or beauty dish.
These will give you a lot of control over the lighting, but they can be a little intimidating for beginners.
If you want to learn more about artificial lighting, make sure to read this post.
Lighting Accessory Tip:
A great, cheap accessory is coloured gels: heatproof sheets of plastic that are available in many different colours.
You can mount them in front of your light source in order to achieve lighting effects like in this photo:
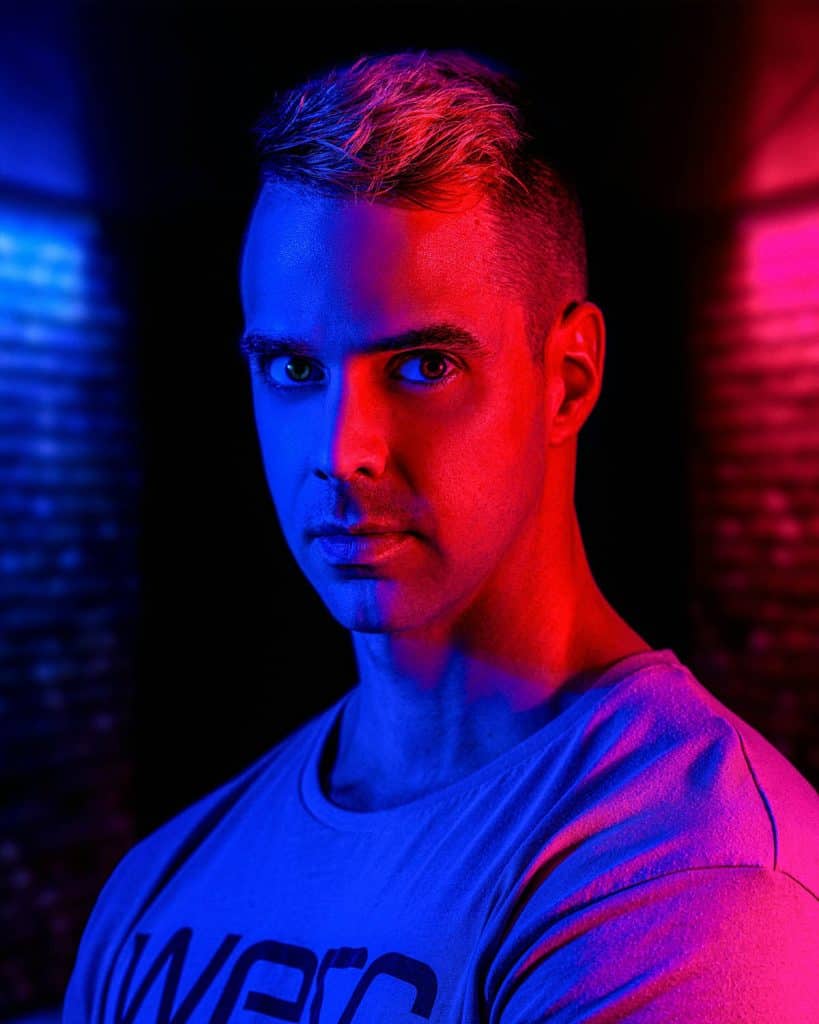
You can buy coloured gels here:
Household Lights
Finally, you can even create interesting lighting with household items such as fairy lights and candles.
Generally, if you’re going for dim lighting, increase your ISO and/or use a large aperture & slower shutter speed so your scene won’t be too dark.
I’ve actually written a whole blog post on mastering low light photography, which you can find here.
Before I continue with the blog post…did you know I’ve written a free ebook with 50 portrait photography ideas? More info below:
Free Ebook: 50 Portrait Photography Ideas
If you love portrait photography, but need some fresh inspiration, download my e-book which contains 50 creative ideas and projects for portrait photography.

…but now, back to the blog post!
2.4) Composition and Framing
Next, let’s discuss how you can use composition and framing to create cinematic images.
There are several visual elements you can use to create interesting, evocative scenes:
Rule of Thirds
The rule of thirds divides an image into nine equal sections using two horizontal and two vertical lines.
When using this composition, you want to place key elements along the (imagined) lines or their intersections.
This will create a harmonious, balanced composition that is interesting to the human eye.
Here’s an example of such a composition:
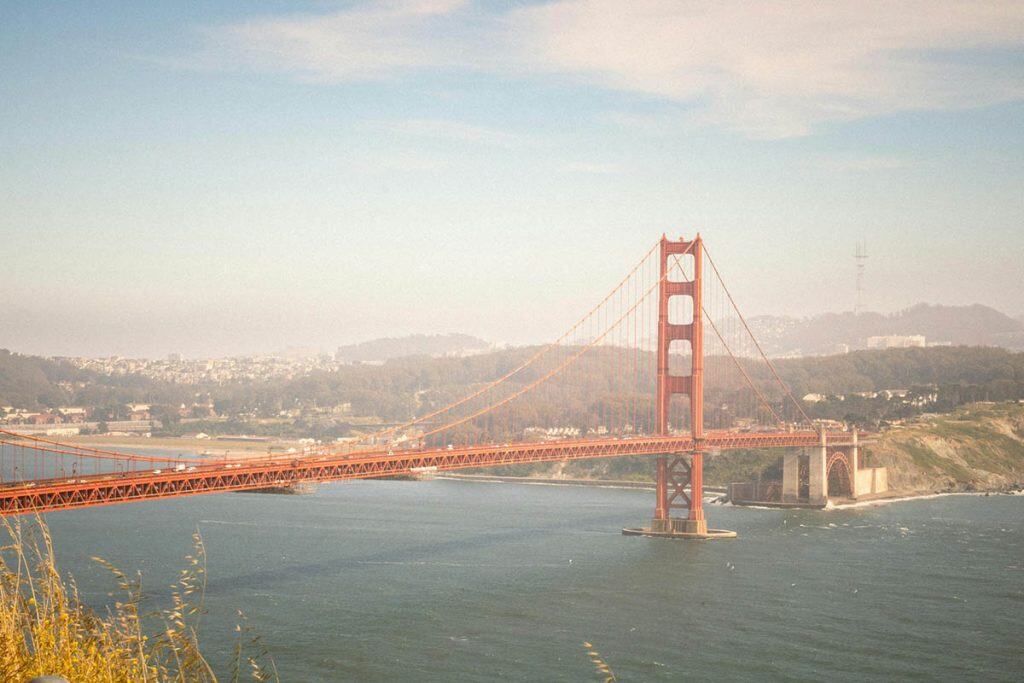
Rule of thirds composition. Image Credit: Nicolas Rodriguez.
Central Framing
In contrast, you can use symmetry by placing the main subject or other important elements in the centre of your composition. This draws attention to it and can convey a sense of power or isolation.
Here’s an example:
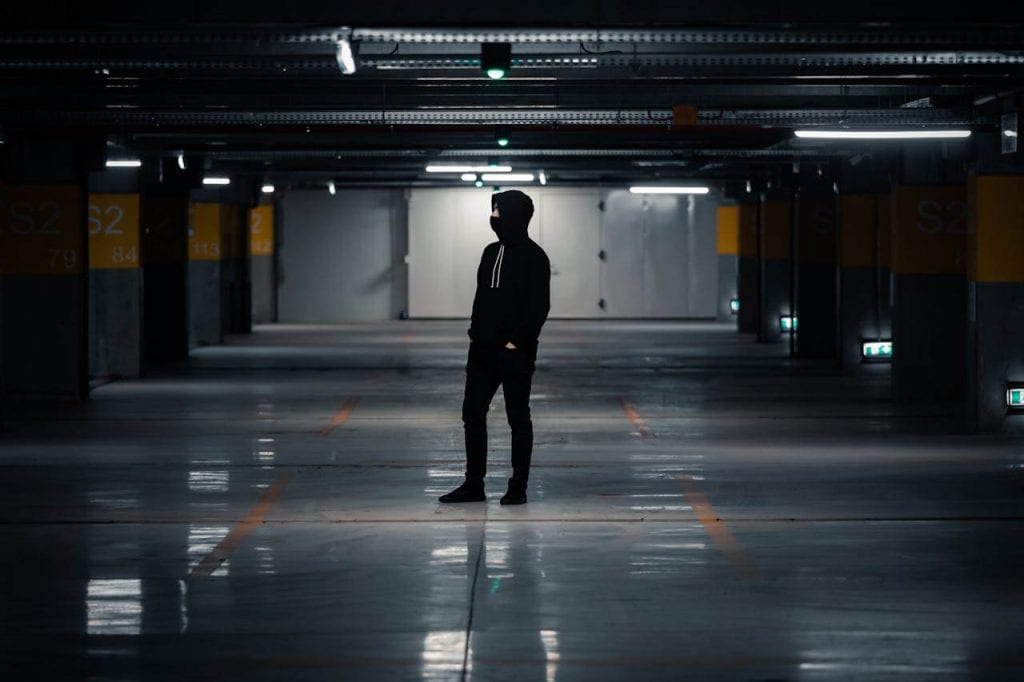
Portrait using central framing. Image credit: Filip Marcus.
Leading Lines
Another great tool is leading lines, i.e. lines and a composition that guide the viewer’s eye through the frame.
Classic examples are roads, staircases or fences.
When shooting indoors, you could use strategically placed objects, furniture, or even shadows to create leading lines.
Negative Space
One of my favourite composition elements is negative space, which means intentionally leaving large areas of the image dark or blank.
This not only emphasises the subject but also leaves a lot of breathing room around it, which can evoke feelings of solitude or introspection.
Here’s an example:

Composition using negative space. Image credit: Jeffrey Czum.
2.5) Colour Grading
Colour is one of the most important elements in photography, and I sometimes spend hours perfecting the colour grading in Photoshop.
When it comes to cinematic photography, colour is one of the best tools in your toolbox.
As an example, look at these two pictures here.
On the left is the “before”, and on the right the “after” picture:
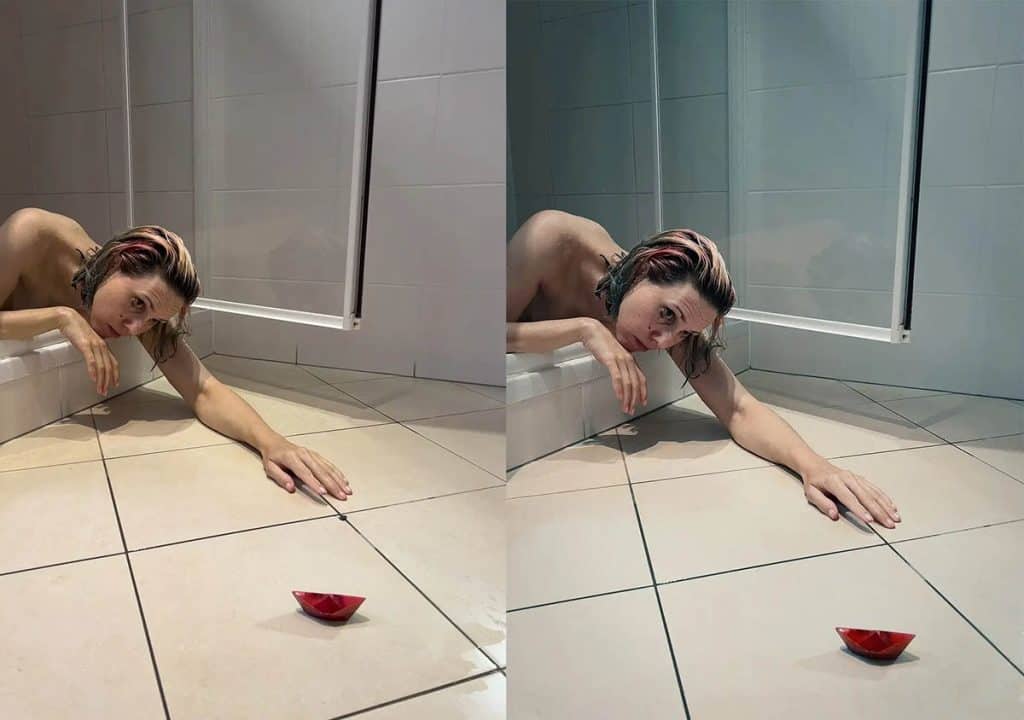
You can see that I added more cyan and red tones to the picture in order to give it a more cinematic look reminiscent of horror movies.
Do Some Research
Watch some movies to get inspired in regards to colour combinations.
Almost every movie is heavily colour-graded – think of the blue and green tones in horror movies or the pastel retro colours in Wes Anderson films.
There are extensive blog articles on colour combinations and cinematic colour palettes, so if you’re interested in this topic, it’s worth doing a Google search.
You may also want to check out the Instagram account @colorpalettecinema.
Use Colour Psychology
Think about colour psychology and colour grade your photo accordingly.
For the photo above, I wanted to evoke a sense of sadness and longing, and I felt that the green/blue tones portrayed these emotions more than, say, orange or yellow would have done.
Conversely, if you wanted to portray a very happy emotion, it might be worth using yellow/warm tones.
Here`s a great article on the subject if you want to learn more.
Colour Grade in Post Production
Use editing software to colour grade your images.
You can easily give photos an overall tint by using the adjustment layer “Photo Filter” in Photoshop.
I also love using the “Colour Balance” adjustment layer to colour grade shadows and highlights independently…for example, make the shadows more blue and the highlights more yellow/orange for a very classic “blockbuster” look.
As you can see, cinematic photography takes a little more effort than just pressing the shutter button, but I think it’s so worth it because the results can be really interesting and more complex than regular portraits or nature shots, for example.
If you do give it a go, I would love to see what you create – tag me at @desireesydow.photography on Instagram!
I promise to keep this blog completely ad-free so you can read without distractions. If you want to support my work, buy me a coffee: It’s a small gesture that makes a big difference!